


Overview
What does the course cover?
This course teaches how to use this presentation tool to its best advantage. The course will explain how to harness PowerPoint 2013 to produce eye catching, effective and professional presentations that look a step above the rest.

Aims
Why take this course?
To enable attendees to produce effective and powerful presentations using all the full features and functionality of the package. To be able to include clipart and graphics in a presentation, import, edit and update graphs and modify master slides.

Audience
Who would benefit?
Anyone who presents to people, and would like their presentations to flow seamlessly in an engaging manner. The course includes suggestions on how to design and layout slides as well as examining some of the skills required to present clearly.
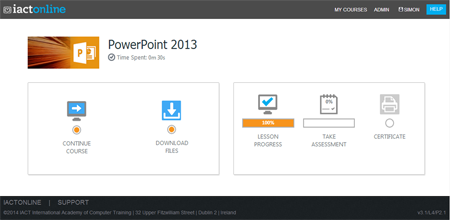
Course Preview
Each course contains high quality, professional video lessons, downloadable exercise files and real-world templates for you to use.
Course Details
Section 1: Introduction to PowerPoint
- Lesson 1: Introduction
- Lesson 2: Opening PowerPoint
- Lesson 3: Tabs and Ribbons
- Lesson 4: Quick Access Toolbar
- Lesson 5: Saving a presentation
- Lesson 6: Closing and Exiting
- Lesson 7: Starting using a built in template
Section 2: Slides
- Lesson 1: Introduction
- Lesson 2: Insert a slide
- Lesson 3: Change layout
- Lesson 4: Create a section
- Lesson 5: Why use sections?
- Lesson 6: Delete sections
Section 3: Text
- Lesson 1: Introduction
- Lesson 2: Inserting text
- Lesson 3: Formatting text
- Lesson 4: Bullets and Numbers
- Lesson 5: Sub Level lists
- Lesson 6: Text boxes
Section 4: Design
- Lesson 1: Introduction
- Lesson 2: Applying a theme
- Lesson 3: Format the background only
- Lesson 4: Save a current theme
Section 5: Smart Art
- Lesson 1: Introduction
- Lesson 2: Using SmartArt
- Lesson 3: Inserting SmartArt – Example 1
- Lesson 4: Inserting SmartArt – Example 2
- Lesson 5: Inserting SmartArt – Example 3
- Lesson 6: Convert text to SmartArt
- Lesson 7: Convert SmartArt back to text
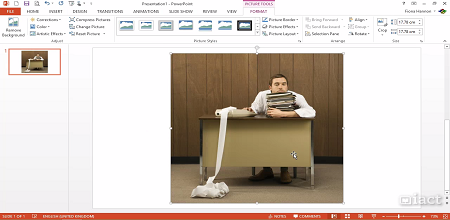
Section 6: Pictures
- Lesson 1: Introduction
- Lesson 2: Insert a picture onto a slide
- Lesson 3: Move and Resize a picture
- Lesson 4: Cropping a picture
- Lesson 5: Picture styles
- Lesson 6: Picture Adjustments
Section 7: Charts
- Lesson 1: Introduction
- Lesson 2: Insert a chart and chart data
- Lesson 3: Moving and resizing a chart
- Lesson 4: Changing the chart type
- Lesson 5: Edit the data
- Lesson 6: Switch Row and Column option
- Lesson 7: Chart elements, styles and filters
Section 8: Videos & Sounds
- Lesson 1: Introduction
- Lesson 2: Inserting a sound file
- Lesson 3: Inserting a video file
- Lesson 4: Editing the video file
Section 9: Transition
- Lesson 1: Introduction
- Lesson 2: Applying a transition effect
- Lesson 3: Transition effect options
Section 10: Animations
- Lesson 1: Introduction
- Lesson 2: Types of animations
- Lesson 3: Applying an animation to an object
- Lesson 4: Applying more than one animation to an object
- Lesson 5: Applying animation to a smartart graphic
- Lesson 6: Applying animation to a chart
- Lesson 7: Removing an animation
Section 11: Master Slides
- Lesson 1: Introduction
- Lesson 2: What is a Master Slide?
- Lesson 3: Editing the master slide
- Lesson 4: Insert new master slide
Section 12: Saving and Printing
- Lesson 1: Introduction
- Lesson 2: Saving options
- Lesson 3: Sharing a presentation
- Lesson 4: Printing a slide show
- Lesson 5: Save as a template
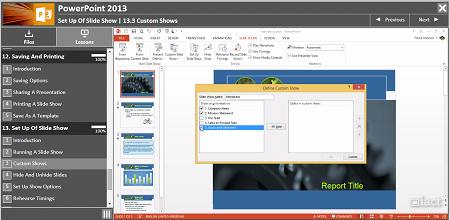
Section 13: Set up of Slide Show
- Lesson 1: Introduction
- Lesson 2: Running a Slide show
- Lesson 3: Custom shows
- Lesson 4: Hide and Unhide slides
- Lesson 5: Set up show options
- Lesson 6: Rehearse Timings
- Lesson 7: Recording a show
- Lesson 8: Shortcuts to use when presenting
Section 14: Review
- Lesson 1: Introduction
- Lesson 2: Proofing a presentation
- Lesson 3: Comments
- Lesson 4: Compare presentations

Skills You’ll Learn
What you’ll be able to do after the course
- Create professional presentations
- Design on screen slide shows for overheads
- Incorporate graphs, clipart and graphics
- Incorporate multimedia like animation into a presentation

How You Can Apply These Skills
What you’ll be able to use these skills for
- Create a wide range of powerful presentations
- Create a corporate presentation to run continuously
- Design presentations for an exhibition
- Present a slide show
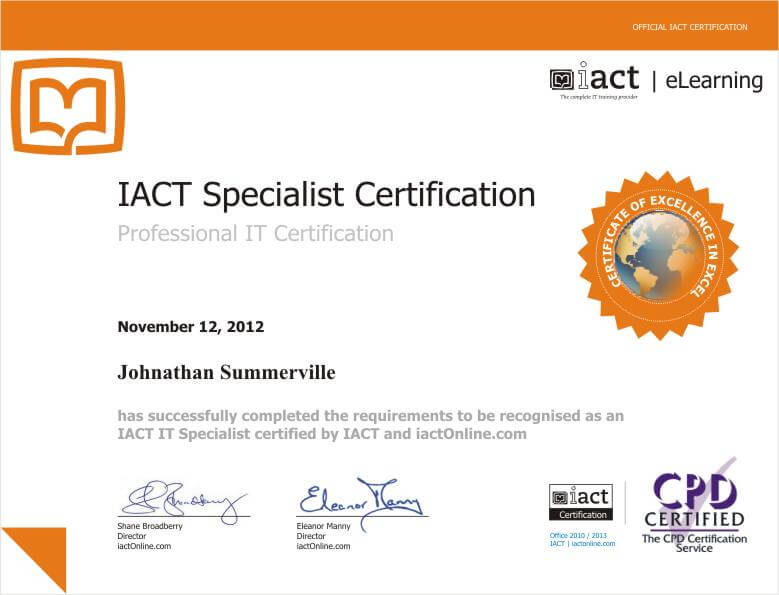
Certification
When you pass you will receive an internationally recognized accreditation certificate like this:

What’s next?
After you have completed the course you may wish to expand your office skills further, or perhaps try our Illustrator or Photoshop courses as you start to get into design.

Careers that require these skills at this level?
PowerPoint is used in practically every business and in nearly all departments in those businesses – ranging from sales to marketing and administration. Any office role will require you to be proficient to this level.

Want to start learning today?
Joining is simple, easy and risk free with our 7 day money back guarantee.


